Okay, time to stir the pot, another Covid Project!

RemE

⚒️ Moderator
Staff member
Joined
Jun 10, 2019
Messages
1,776
Media
503
Reaction score
1,588
Location
Corona Del Mar, California
Grill
Timberline 850
I'm referring to the Pellet Hopper and the challenges with the pellet sensor, this pot needs stirring!

While I like having a pellet sensor, I don't much care for the accuracy of the stock setup. The big issue is that as the auger draws out the pellets, a funnel shaped trench grows which causes false pellet level reporting. On long cooks I'm often opening the hopper and leveling the pellets by hand and being a tech head, can't just let this be. Engineers are known to tinker until they break stuff.

This thread will chronicle my failed and final quests for accurate pellet level reporting.
 
Last edited:
Failed Attempt #1 Vibration

Earlier I had read one guy describe taking a small clip on fan, breaking off a blade to imbalance it and clipping it on the hopper. The vibration caused the pellets to self level, but others were concerned about this much constant vibration's effect on the grill life.

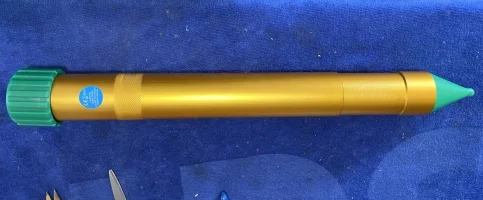
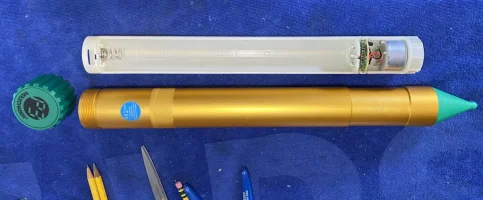
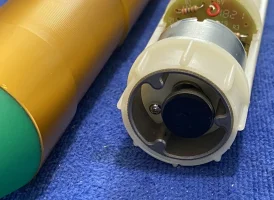
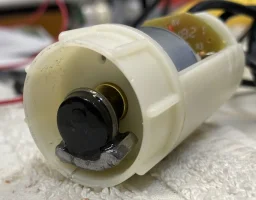
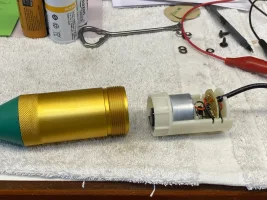
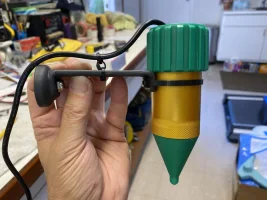
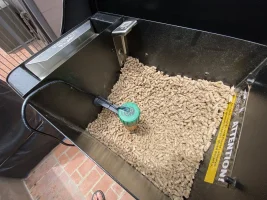
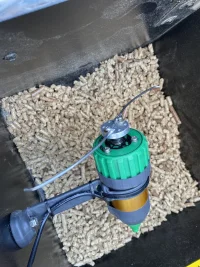
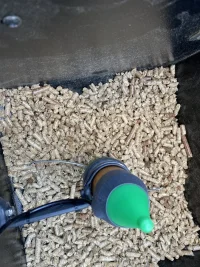
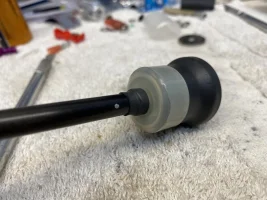
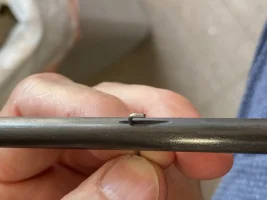
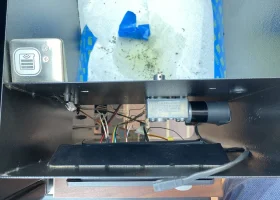
On this theme I thought of a "Mole Chaser" this is a spike with a vibrating sound maker that one sticks in the garden to repel these creatures. I know that they vibrate for something like 10seconds every couple of minutes. I located one, opened it up, added more weight to the motor to really make it shake. Then I cut the tube down, and made an arm with strong magnet mount to hold the spike in the middle of the pellet hopper. I added a power supply to power it since the battery box was lost in the shortening process.

Results? Fail, once buried under 10lbs of pellets, the vibration was not strong enough to move the pellets and fill in the "Auger Funnel Void".


But it was good fun, next up, the first stir.
 

Attachments

  • IMG_8183.JPG
    IMG_8183.JPG
    164.3 KB · Views: 91
  • IMG_8184.JPG
    IMG_8184.JPG
    159.2 KB · Views: 62
  • IMG_8185.JPG
    IMG_8185.JPG
    189.1 KB · Views: 61
  • IMG_8189.JPG
    IMG_8189.JPG
    124.2 KB · Views: 59
  • IMG_8192.JPG
    IMG_8192.JPG
    230.7 KB · Views: 66
  • IMG_8201.JPG
    IMG_8201.JPG
    149.7 KB · Views: 107
  • IMG_8213.JPG
    IMG_8213.JPG
    273.3 KB · Views: 111
Last edited:
Failed Attempt #2 Horizontal stir.

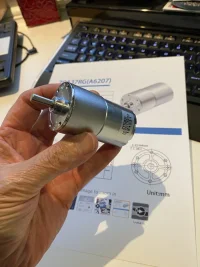
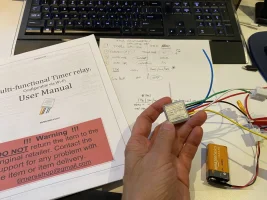
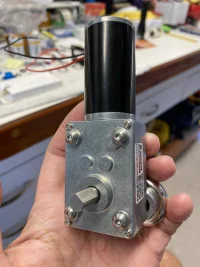
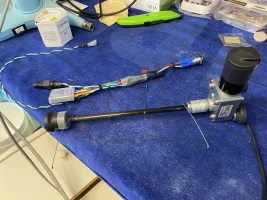
Since I had the spike case, I looked for more powerful motors. Turns out that geared motors are cheap and plentiful with all of the robotics builders out there. I found a nice co-axiel geared unit that fit in the tube. I was going to have to design a controller to drive the motor intermittently to stir the pellets. Once again, I stumbled onto some very cool, small, and easy to program timer modules which made these next trials much easier.

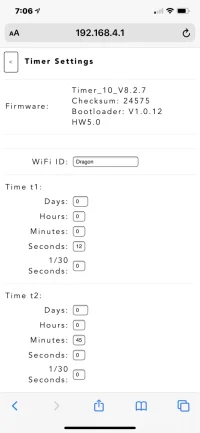
I inverted the spike, ran the motor shaft thru the cap, and made an S-Shaped stir rod out of 1.5mm music wire. The timer allows me to program the motor run time and the interval between runs. I figured two stir revolutions every 30min should be enough.

Once again, Fail. While good on paper, the pellets are pretty heavy and dense when piled in the hopper. The motor on the arm struggled and moved all over under the load. I was on the right path, but the stir setup needed to be much more secure.

Also the stirring wires need to be more flexible to move the pellets but not break them up. Stirring the pot at intervals of 45min or longer minimizes pellet damage. The wiring setup is simple and solid, so motor swaps will be easy moving forward.
 

Attachments

  • IMG_8487.JPG
    IMG_8487.JPG
    136.2 KB · Views: 59
  • IMG_8488.jpg
    IMG_8488.jpg
    194.5 KB · Views: 68
  • IMG_8355.JPG
    IMG_8355.JPG
    235.4 KB · Views: 66
  • IMG_8354.JPG
    IMG_8354.JPG
    350.6 KB · Views: 62
  • Timer Config1.PNG
    Timer Config1.PNG
    267.7 KB · Views: 62
  • Timer Config2.PNG
    Timer Config2.PNG
    247.4 KB · Views: 65
Last edited:
It Works! Attempt #3 "The Cotton Gin"

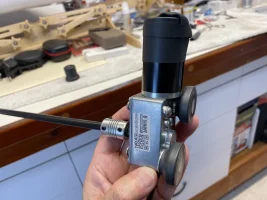
Lessons learned, powerful motor, solid mounting with two point support preferred, very thin and flexible stir wires to pass thru the pellets without hurting them or the motor.

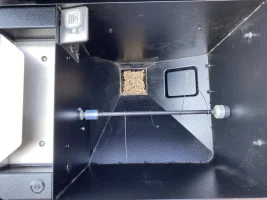
I found a side geared motor, stronger, and easily mounted to the inside wall with magnets. Used a flex coupling and 8mm carbon fiber drive shaft with skate board bearing support at the other end, again magnet mounted to the inside wall. I used 1mm music wire "whiskers" located along the shaft to stir a large portion of the pellets into the "Auger Funnel Void".


This is working well enough now, the timer Module intervals can be set via built-in WiFi so I can use my phone to easily make timing changes to fine tune the setup.

I may go ahead with a final version, mount the motor to the outside, above the power switch. This would make for a very clean stir stick in the pellet hopper and the motor is small enough to not get in the way outside with the cover etc. I added an illuminated power button, same design as the controller's power button, under the hopper lid. I went with blue LED color so I could see it in daylight.
 

Attachments

  • IMG_8373.JPG
    IMG_8373.JPG
    145.1 KB · Views: 110
  • IMG_8391.JPG
    IMG_8391.JPG
    134 KB · Views: 90
  • IMG_8377.JPG
    IMG_8377.JPG
    108.6 KB · Views: 86
  • IMG_8430.JPG
    IMG_8430.JPG
    193.8 KB · Views: 84
  • IMG_8431.JPG
    IMG_8431.JPG
    148.8 KB · Views: 84
  • IMG_8403.JPG
    IMG_8403.JPG
    104.3 KB · Views: 90
  • IMG_8419.JPG
    IMG_8419.JPG
    314 KB · Views: 117
  • IMG_8450.JPG
    IMG_8450.JPG
    251.6 KB · Views: 119
Last edited:
#4 Final Version, Permanent Internal Motor Mounting.

Since the stirring setup seems to do what I wanted, I decided to go ahead and make it more permanent. I was planning to mount the motor on the back but when I opened up the top of the hopper, above the controller, I found that the motor would fit inside without interfering with the controller or existing wiring, making it hidden.

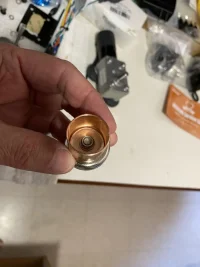
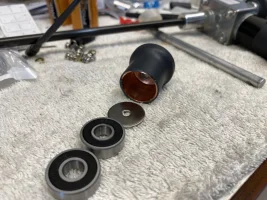
I took the drive shaft support bearings on the other end, removed the magnet, and bolted the bearing cup to the inside of the rear of the hopper. Now the stir rod and whiskers are much cleaner inside the hopper. I added heat shrink tubing to the shaft ends and flex coupler to keep pellet dust out of the bearings etc.

The spring steel whiskers stir the pellets well, with the flexing they shoot pellets like a popcorn maker, so the lid needs to be closed!

Here's my post with links to the parts that I used;
(2) Okay, time to stir the pot, another Covid Project! | Page 2 | Traeger Owners Forum | Traeger Grill (traegerforum.com)


I will add a video of it in action with a pellet funnel present soon.
 

Attachments

  • IMG_8505.jpg
    IMG_8505.jpg
    189 KB · Views: 108
  • IMG_8506.jpg
    IMG_8506.jpg
    248.5 KB · Views: 102
  • IMG_8507.jpg
    IMG_8507.jpg
    157.9 KB · Views: 105
  • IMG_8508.jpg
    IMG_8508.jpg
    211.1 KB · Views: 108
Last edited:
It's working really well! I just replaced the "ticklers" with longer ones and trimmed them after being mounted in the hopper, so they just miss the sides. I wound them a bit on the carbon fiber drive shaft to give them more spring so they never bind, even with a full hopper. And just for grins, I got a spare motor in a lower gear range. Now the shaft spins at 3.5rpm instead of 12rpm, figured stronger still and more gentle on the pellets.

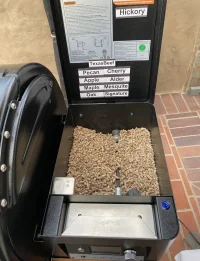
Here's a picture of the hopper after 12 hours of running, pellets are pretty level, and this was before I extended the ticklers to their max lengths which will only make it better at all pellet levels. I also reversed the tickler order, so they will not only level the pellets but will lightly push the pellets towards the front of the hopper. Notice that the pellets are a bit higher in the back of the hopper, this is before this last tweak. I had the timer set to stir two revolutions every hour.

Also attached video of the current "final" version with improved tickler whiskers.

I didn't do a time lapse as it was misty and wet out when I cooked my brisket so I kept everything closed up. I don't have any overhead covers in my yard, may need to get a cheap pop up for this winter now that I'm cooking more.
IMG_8553.jpg

 
Last edited:
Very nice! I like your final design a lot.
I have some of those gear reduction motors laying around from another project, so I might do something like this with one of them.
 
Man RemE you are on a roll. Whats next? Internal camera on the cook?
 
I knew it, classic. Still getting my parts together on your kick ass table. But now had a high temp alarm, fire in hopper and just trying to get the grill replaced. Traeger Rep. called the place I bought it from and they hung up on him. Man have had this grill since July and 4 cooks on it. CRAZY !!
 

Latest Discussions

Back
Top