Roadside Traeger Find - Refurb Process

Cajunman

New member
Joined
Sep 14, 2021
Messages
19
Media
23
Reaction score
15
Location
Houston, TX
Grill
Ironwood 650, Lil Tex, Barn Find Lil Tex Elite
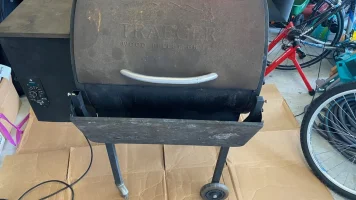
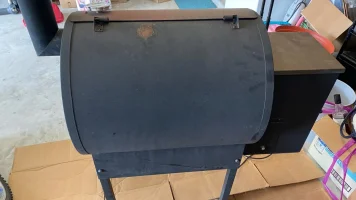
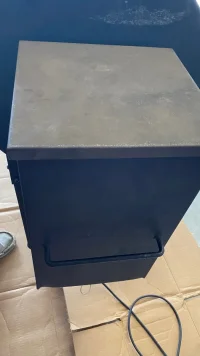
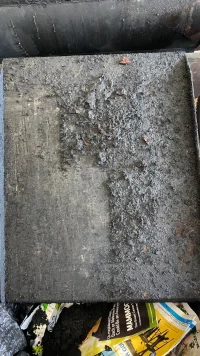
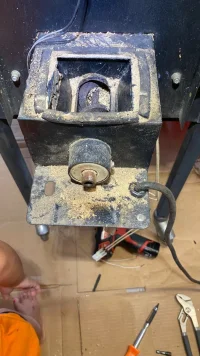
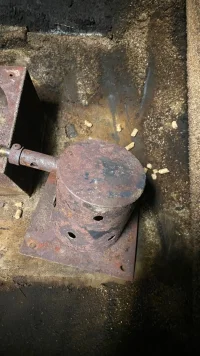
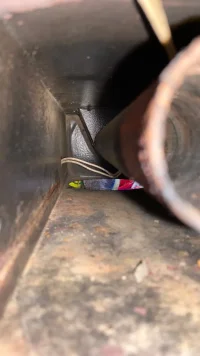
Some good luck led me to a lil tex elite on the side of the road being thrown out. After wheeling it down to my home, quickly found out this one has been through a rough time in the elements but is completely saveable.

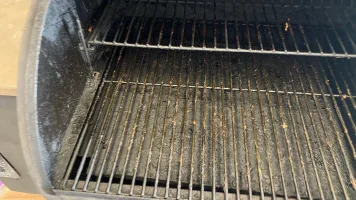
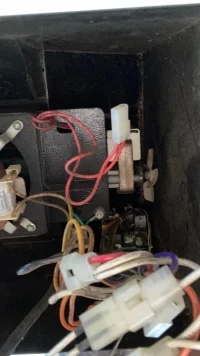
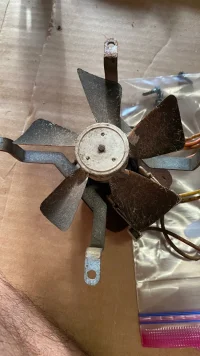
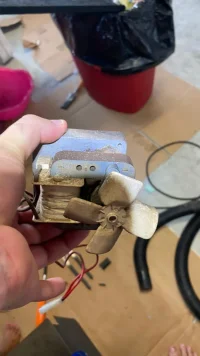
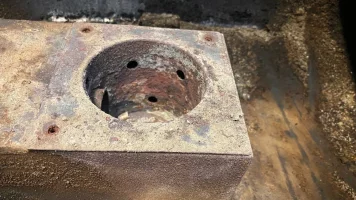
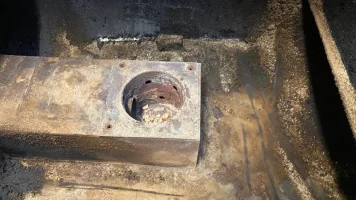
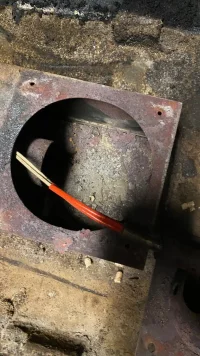
In looking for parts, I found some off brand parts on amazon for great prices. Auger motors, fan, firepots, controllers, hotrods. My question is does anyone here have experience with some of these off brand parts? I narrowed down it's issue to just the hot rod, but the component area is a mess so I plan to just replace all the parts I can, clean it up, repaint it and add it to my collection as my third Traeger.

Any advice on the refurb process from anyone who has been through it would be appreciated as well!
 
I got a Timberline 1300 (Gen 1 I would later learn) used on Craiglist. It would not even turn on in the beginning (bad LCD display), but just be cleaning and futzing with the display/buttons, I was able to totally get it online, working and it holds the programmed temps well enough. I compare the temp probe with some Inkbird probes (I have no idea which, if any, of them is actually correct), and they all sort of agree with each other to within 5-10F.

So I am pretty darn happy with the purchase of a $2000 unit for basically less than 1/3rd of that price.
 
My suggestion is that you do a search on YouTube for Traeger refurbishes. There are several out there and I enjoy watching them occasionally. Here is an example:
This is exactly what I want to do! But with better paint colors hahaha. I am also going to give some of the off brand components a try. I decided against using a non-Traeger controller considering I feel that is the main important part. But other than that, I will use components from amazon that claim to have some better build quality (better auger motor, ceramic coated fireport) and see how those get me. I will keep this thread updated with my progress.
 
Update #1: Spent some time this weekend breaking down this traeger and starting on the clean up. My parts came in and they all look very nice. As I mentioned, I expect the controller is the item with the real Traeger DNA, so I will continue to work with this old one until I can find a cheaper one. Other than that, I now have a new fan, auger motor, hotrod and a ceramic coated fire pot, which looks very nice.

The amount of build up on this thing was incredible. From the inside of the main barrel, the buildup seems to indicate not many cook hours were put on this, but the auger and firepot show signs of never being cleaned.

I started with taking off the electrical components and then removed the hopper (Which I had no idea just slides right off! So neat). From there, I removed the auger motor and then the auger. It was wild how caked up the auger was with pellet dust.

My next steps will be to finish cleaning this up, sand it down and then repaint.
 

Attachments

  • IMG_4172.webp
    IMG_4172.webp
    129.6 KB · Views: 92
  • IMG_4173.webp
    IMG_4173.webp
    148.5 KB · Views: 82
  • IMG_4174.webp
    IMG_4174.webp
    83.3 KB · Views: 85
  • IMG_4175.webp
    IMG_4175.webp
    180.4 KB · Views: 85
  • IMG_4176.webp
    IMG_4176.webp
    52.4 KB · Views: 83
  • IMG_4177.webp
    IMG_4177.webp
    64.5 KB · Views: 80
  • IMG_4179.webp
    IMG_4179.webp
    200.3 KB · Views: 89
  • IMG_4183.webp
    IMG_4183.webp
    104.9 KB · Views: 85
  • IMG_4185.webp
    IMG_4185.webp
    312.7 KB · Views: 86
  • IMG_4188.webp
    IMG_4188.webp
    126.3 KB · Views: 86
Update #1 More Pics
 

Attachments

  • IMG_4191.webp
    IMG_4191.webp
    90.9 KB · Views: 82
  • IMG_4193.webp
    IMG_4193.webp
    129.5 KB · Views: 78
  • IMG_4194.webp
    IMG_4194.webp
    55 KB · Views: 76
  • IMG_4195.webp
    IMG_4195.webp
    74.7 KB · Views: 76
  • IMG_4196.webp
    IMG_4196.webp
    98 KB · Views: 75
  • IMG_4198.webp
    IMG_4198.webp
    150.7 KB · Views: 78
  • IMG_4199.webp
    IMG_4199.webp
    153.3 KB · Views: 81
My next steps will be to finish cleaning this up, sand it down and then repaint.

Nice find.

I've been using Rust-Oleum High Heat Ultra. It is a nice satin black.

You probably know this already, but only paint the outside. The paint is not suitable for painting inside a cooker or smoker.

HAZARDOUS DECOMPOSITION: By open flame, carbon monoxide and carbon dioxide. When heated to decomposition, it emits acrid smoke and irritating fumes. Contains solvents which may form carbon monoxide, carbon dioxide, and formaldehyde.


1633498355029.webp


Nice find.

I've been using Rust-Oleum High Heat Ultra. It is a nice satin black.

You probably know this already, but only paint the outside. The paint is not suitable for painting inside a cooker or smoker.
Haha, yes I did not plan on painting the inside. Always good advice though!

How does that satin black look in person? I am actually planning to do the High Heat green spray with some high heat white accents (yes I know, the white will show grime more, I am willing to deal with that for the look I want hahaha).

Did you sand down your whole paint area or just areas of rust? I am debating on how much to sand mine. I am leaning toward all of it.
I only sanded down rusted areas.

I've painted the cast aluminum cookbox on my 2000 weber silver, the steel legs aka the nest of my BGE, and an 8 inch diameter rust spot on the outside of my PB pellet with the ultra.

I used primer on the BGE nest because it had some rust, and is a pain to dismantle to paint. Orig paint did ok for 10 years, this will prob last as long.

On yours, you may want to prime the bare metal.

When I addressed the rust on my pitboss I could not find high temp primer in stock so I just sanded the rust away and painted it with ultra.
 
On yours, you may want to prime the bare metal.

When I addressed the rust on my pitboss I could not find high temp primer in stock so I just sanded the rust away and painted it with ultra.
Excellent advice, I didn't think to put a primer on the bare metal! I will look into that.

I am a tinkerer but not a painter/refinisher, so some of this is new to me but I want to learn to give more Traegers a new lease on life, so I am learning some of this on the fly. But I love it.
 
Excellent advice, I didn't think to put a primer on the bare metal! I will look into that.

I am a tinkerer but not a painter/refinisher, so some of this is new to me but I want to learn to give more Traegers a new lease on life, so I am learning some of this on the fly. But I love it.

So, a couple of things to think about. The original finish is textured. If its rusty, sanding it will make it smooth, and then rattle can paint or even paint plus primer will leave it with smooth finish. you can make it look nice yet it will be smooth.

on my pit boss, the rust was under the front tilt up shelf. I didn't really care how it looked because it was on the lower slope of the drum behind a shelf.

I've read that some people are using rustoleum high heat in a quart can, and rolling it on, and letting the roller mat up the paint. so basically paint it, let it dry and go over the paint again with the roller as it is almost dry. This will give it some texture. Then they finish it with a second coat of rattle can. I have not tried this but I might.

I'm going to attach a couple of pictures or the RustO ultra high heat. Not sure how they will turn out.

The BGE is a bit dirty. I wiped off one section so you can see it is a nice satin finish and good for high heat.

20211006_173907.jpg


The bottom of the pellet smoker. about half of the area I repainted is covered with grease dripping down, and I think the grease contributed to the rust. The barrel portion has pretty much lost the nice hammered texture that you can see on the leg. Not only from my painting, just not painted that well.

I'm not worried what the bottom of a smoker looks like as long as it isn't rusting away.

20211006_174701.jpg
 
Last edited:
I've read that some people are using rustoleum high heat in a quart can, and rolling it on, and letting the roller mat up the paint. so basically paint it, let it dry and go over the paint again with the roller as it is almost dry. This will give it some texture. Then they finish it with a second coat of rattle can. I have not tried this but I might.
Excellent idea on the roll on. For this one, I will be sanding it down completely and using the spray can, mostly because the roll on paint doesnt come in the colors I want to do this one in (green and white, yes I know the white will get dirty, I don't mind cleaning for the look). I may try the roll on method for my next refurb.
 
Update #2: Got in some more work on the traeger over the last few days. I was in a groove and forgot to take alot of pictures, but I did get some.

The phase I am in now is mostly clean up. I used a plastic putty knife to scrape excess buildup from the inside without ruining the original finish underneath and maintain as much of the seasoning as possible. I was able to remove the lid, chimney, and the fire pot, while completely scraping out the inside, all the grease trap areas and the inside of the lid. I began washing the front shelf and the outside of the lid yesterday.

The work is definitely slower than I thought, but also much more satisfying than I expected! Knowing I will be getting this up and running, looking fresh in a new coat of paint, is really a great feeling. What I thought could be a 3 day project will probably be more like a 3 week project, but I am taking my time and doing it right.

For the couple pics I have, we can see the firepot was in bad shape, as was the hot rod. Even the little shaft where the pellet tube is was full of gunk and grass and mess. But its all cleaned up, as the pics show.

Little tip I found online, if replacing your hotrod, tape the old hot rod to the plug end of the new one to pull it through. It looks like a pain in the butt to try to thread that yourself.

Next up, I will be continuing my cleaning. The barrel needs a good scrub, as does the hopper. Once I have it mostly clean, I will begin sanding off the old paint and rust.
 

Attachments

  • IMG_4239.webp
    IMG_4239.webp
    203.7 KB · Views: 65
  • IMG_4240.webp
    IMG_4240.webp
    206.1 KB · Views: 62
  • IMG_4241.webp
    IMG_4241.webp
    184.2 KB · Views: 65
  • IMG_4242.webp
    IMG_4242.webp
    173.7 KB · Views: 68
  • IMG_4378.webp
    IMG_4378.webp
    51.7 KB · Views: 63
Back
Top